How to Use and Pay for Stripe Services in Nigeria

Stripe is everywhere. Whether you’re checking out on a global ecommerce site, subscribing to a SaaS tool, or paying for a course, there’s a high chance Stripe is powering that transaction behind the scenes.
But if you’re based in Nigeria, you know the struggle is real.
From setting up a Stripe account to actually paying for Stripe-related tools or services, you’re likely to run into walls. Card declined. Country not supported. Naira restrictions. Monthly limits.
But guess what? That’s not the end of the road.
This blog post walks you through:
What Stripe is
Why Nigerians need it
The common payment issues Nigerians face
How to pay for Stripe services with ease
Tools you can now access using a reliable USD card
And how Myaza helps make it all smooth and stress-free
Let’s get into it.
What’s Stripe, and Why Is Everyone Talking About It?
Stripe is a payment platform that lets businesses accept online payments from anywhere in the world. It powers the checkout for major companies like Amazon, Shopify, Lyft, and Notion.
But it’s not just for tech giants, thousands of small businesses, creators, freelancers, and developers use Stripe to:
Sell products and services
Accept donations
Get paid for freelance gigs
Charge for online courses, templates, subscriptions, and more
It’s reliable, secure, developer-friendly, and very easy to scale with. But…
Stripe Isn’t Fully Available Here In Nigeria
Stripe currently doesn’t support businesses registered in Nigeria.
This means if you try to sign up with your Nigerian address or use your local card for Stripe-related tools, you’ll get blocked.
So, what do people do?
Many Nigerians get creative:
Registering foreign businesses through Stripe Atlas
Using US or UK addresses
Getting US bank accounts via fintech services
Setting up Stripe accounts for freelance or business clients abroad
But even if you manage to get access, one big problem still remains...
How do you pay for Stripe tools, subscriptions, and related services?
Why Most Cards from Nigeria Don’t Work
This is where frustration kicks in.
Let’s say you’re using Stripe with:
A Shopify store
An online invoicing tool like Bonsai
Or an analytics platform like Baremetrics
Sooner or later, they’ll ask you to add a card for billing.
That’s where things fall apart:
Your naira card gets rejected
You can’t add your Nigerian bank’s dollar card
You’re stuck trying to borrow a card from someone abroad
Or you're losing out on features because Stripe can’t bill you
So, what’s the solution?
This Is Where Myaza Comes In
Let’s say you’ve successfully set up a Stripe account using a registered foreign entity (US, UK, etc.). Or maybe you’re working for a startup abroad that uses Stripe, and you need to manage their payments stack.
Sooner or later, you’ll run into the need to pay for:
Stripe Atlas (for business incorporation)
API usage overages
Stripe Climate contributions
Tools like Baremetrics, ChurnZero, ChartMogul
Webhooks, security, testing, or third-party Stripe integrations
And most of them need USD cards. That’s where the Myaza USD card makes everything easier.
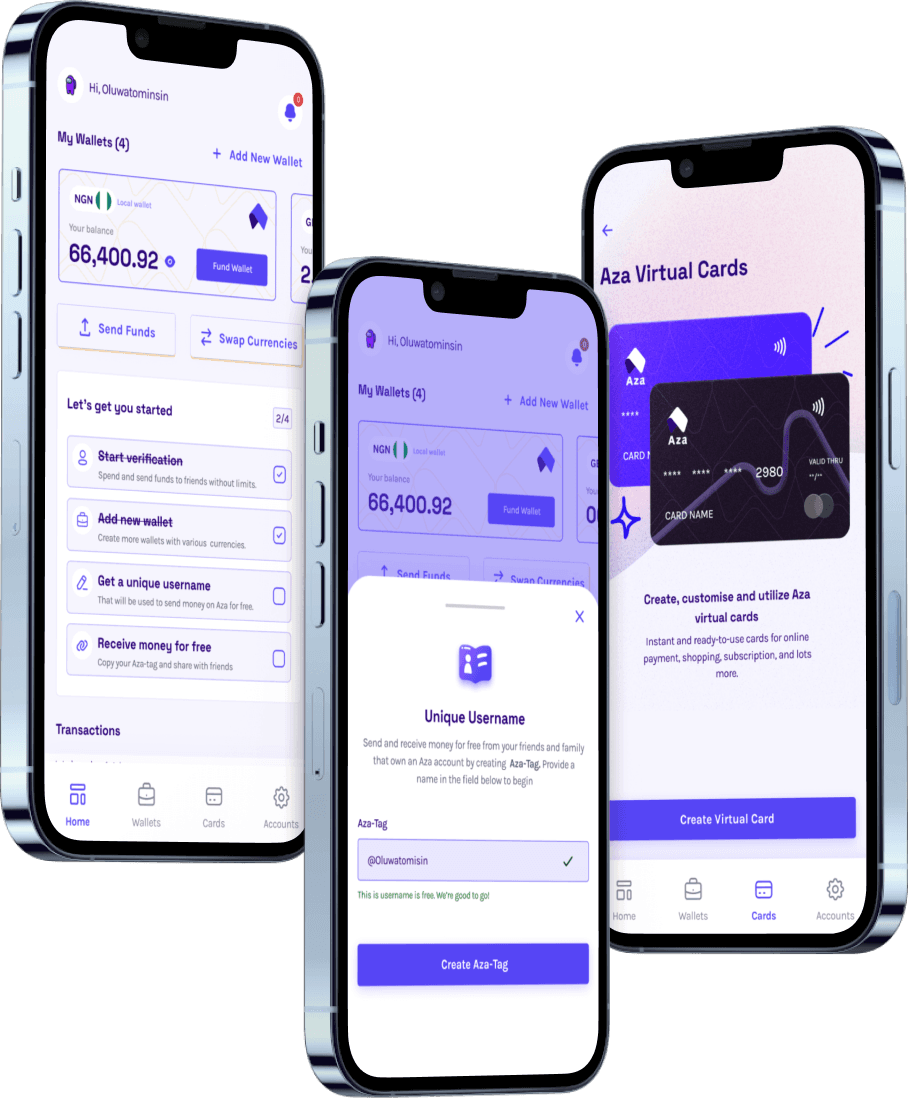
How to Pay for Stripe-Related Services Using Myaza
Here’s a no-stress guide to get started:
Download the Myaza app It’s available on iOS and Android. Set up is smooth and fast.
Create an account and complete your KYC Just basic verification, nothing intense.
Generate your USD virtual card You can choose between Mastercard or Visa. It's super affordable.
Fund your card using USDT, USDC, or Naira You can fund using crypto (across multiple networks like Solana, BSC, Ethereum) or through local transfers.
Go to Stripe or any tool/platform you need Add your Myaza card details and pay like you’re in New York or London.
That’s it. No international banking drama. No failed payments. No “card not supported” message. Just smooth, dollar-based payment that works for all your Stripe needs.
Stripe-Connected Services You Can Now Access with Ease
When you start using Stripe, you’ll eventually need to pay for services that integrate with or enhance your Stripe setup. These include:
Stripe Atlas – For incorporating your business in the US
Zapier – To automate your workflows
Memberstack – For managing gated content and memberships
Outseta – For building a SaaS business without code
Ghost + Stripe – For blogs and newsletters
ChartMogul & Baremetrics – For tracking revenue
Hosting – Netlify, Vercel, Heroku, Render
Invoicing tools – Bonsai, Harlow, And.co
You can now pay for all of these directly with your Myaza card.
What If You Also Want to Receive Stripe Payments?
If you’re a freelancer, SaaS founder, or creator building a global audience, you probably don’t want to just pay, you want to get paid too.
Here’s how it works:
Set up a Stripe account via a registered US entity (e.g., Stripe Atlas)
Connect it to a US bank account (e.g., via Mercury or Wise)
Receive global payments through your platform (e.g., Gumroad, Shopify, your own app)
Transfer earnings to your US bank account
Use Myaza to receive the funds in USD, or convert to Naira
Why People Love Using Myaza for Stripe-Related Payments
Fast card creation
Crypto + naira funding options
Works on all Stripe-connected services
No embarrassing card declines
Simple interface
Affordable fees
Finally…
Stripe is not just a payment tool, it’s the gateway to global business.
And while Nigeria isn’t officially supported yet, thousands of Nigerians are finding smart ways to plug in, operate globally, and grow their income.
But to do it right, you need two things:
Access to Stripe (via a US or UK business)
A reliable way to pay for Stripe and connected tools
Myaza gives you that second part, in the most seamless way possible.
So whether you’re a freelancer, developer, course creator, or startup founder, now is the time to stop struggling and start scaling.